Goodbyeee - Copymaster 3D 300

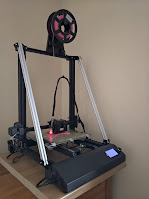
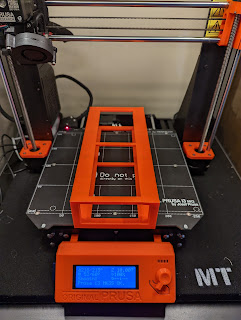
With the arrival of the Prusa i3 mk3s it was only a matter of time till I had to let the Copymaster 3D 300 go.
It's not because it is a bad printer, but it can't do anything that the Prusa cannot aside from having a larger printing volume which I have had no need for. The printer was listed for sale and quickly snapped up by a Copymaster 400 owner who fancied the smaller machine to work along side his monster.
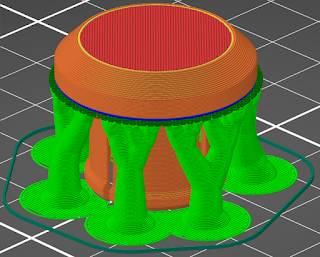
Ironically I printed a batch of Christmas baubles this week and Prusa slicer dropped into the Copymasters setting allowing me to print double the amount of baubles, well it would have if I hadn't gone and sold it anyway....
Hi there,
ReplyDeleteI've had a look through your posts and enjoy reading them having the same printer as you (Copymaster).
I was wondering if you had some settings I could try, I plan to print a space x crew dragon. I'm still getting some issues with my prints, over hangs are struggling and the first layer is always hit and miss, (Think I need to get myself a BLtouch). The Copymaster seems pretty rare, so I've always looked to your blog for guidance as it seems the only good advice out there for the printer.
Cheers for the compliments.
DeleteI don't think there is much that I have done that isn't listed on this blog already but I will give you a quick rundown on some of the bits I have done in the past:
I would check the filament rollcall for basic settings stuff.
Getting the bed level for me was a big issue which I made better with masking tape and a glass bed helped too. The Z axis can get wonky so give that a check as well, some anti back lash bushings helped there.
A Bltoch is a nice thing to have. I found that it kept things okay for longer than manually leveling.
Bed adhesion was all thanks to good old pritstick. I was going to look into updating the main board and stepper drivers then run a custom version of Marlin to see if that made things any better.
Here is my start and end code. If you have read the "Hush" blog entries, you will know I didn't get far with manual fan control:
My start code:
M107 ; Fan off
M117 Heating bed
M140 S{material_bed_temperature_layer_0} ; Set Heat Bed temperature
M190 S{material_bed_temperature_layer_0} ; Wait for Heat Bed temperature
M104 S160; start warming extruder to 160
M105 S125
M117 Checking bed level
G28 ; home all axes
G29 ; Auto bed-level (BL-Touch)
G92 E0 ; reset extrusion distance
M104 S{material_print_temperature_layer_0} ; Set Extruder temperature
M106 S255
G1 z5 ; lift
G1 X20 Y28 F3000 ; avoid binder clips
G1 Z0.2 F3000 ; get ready to prime
M117 Hot end heating
M109 S{material_print_temperature_layer_0} ; Wait for Extruder temperature
M117 Prime
G1 X120 E10 F600 ; prime nozzle
G1 X150 F5000 ; quick wipe
G92 E0 ; Reset Extruder
G1 Z2.0 F3000 ; Move Z Axis up little to prevent scratching of Heat Bed
M117 HPE
My end script:
G28 X0 ; home x axis
G1 E-1 F300
G1 Y450 F3000 ; move bed to front
M107 ; turn off cooling fan
M104 S0 ; turn off extruder
M140 S0 ; turn off bed
M84 ; disable motors
M117 FIN