Initial setup - Copymaster3D 300
Intro
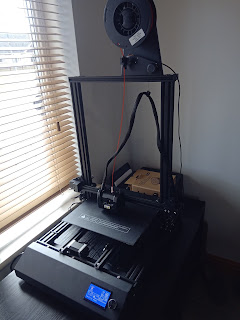
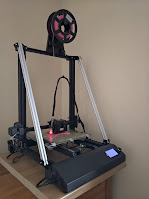
With the Copymaster 3D 300 built and kit PLA installed I was itching to do my first print.
I knew however; that there was no point in barrelling into this. There are a few manuals that comes on the printer SD card which would end up tripping me up but for now I was aware of the quick setup guide, user manual, an image with cura settings on it and a Q&A (FAQ) type thing.
Bed leveling
I had followed the user manual for the build and setup so far which, after building, takes you through leveling the bed.
It doesn't say where to test from but with the head homed and the stepper motors disabled I was able to set the bed plate level by measuring each corner. The manual says to go till the nozzle just touches the bed but I had seen others use a piece of paper to gauge the downward pressure on the bed. I'd raise the bed till the paper was just griped and move on to the next corner. I then repeated this again to ensure that one adjustment hadn't effected the others.
"hmmmm."
Moving the plate in the Y axis showed that there was a consistent valley running down the centre two thirds of the bed from edge to edge. Basically my bed is warped. To compensate for this I raised the bed uni formally on all corners till I had correct clearance in the centre.
This would work fine for large items but will deck out the nozzle if I go to the extremes of the X axis. It also means i have to be careful when turning the printer on as I need to ensure the nozzle has risen off the bed so it doesn't melt the plastic surface.
Not fantastic.
Software
I opted to download Cura to get the most up to date version and set it up with the details on the image provided on the Copymaster website.*SPOILER* I'll get into this later but there is another user manual hidden with the Cura installation. it has all of the settings in there to manually install your printer along with some G codes that help solve some of the problems I was having.
There is no Copymaster 3D 300 on the list of printers in Cura s the printer needed to be set up manually. There are resources for this but for older versions of Cura. I found things like filament size weren't in the large drop down menu but hidden under extruder in the printer settings. The rest was pretty easy with a few things added in preferences.
I scanned the user manual again (I really didn't want to break it!) and spotted I had missed a part of the filament loading step. A bit of menu diving and I had a small string of red PLA to play with whilst I did the next bit.
 I felt like I was ready for a test print and fired up the 5mm stepped test block printed with recommended setting except for using a skirt rather than a raft.
After a short while the first print was done and it actually looked pretty smart!
I clearly had some bed adhesion issues and the skirt had barely printed but it had actually made something fairly accurately representing what I had asked it to do.
I now had a base to go from and adjust some setting to dial this thing in. So far it was proving it could produce a pretty acceptable product!
Firmware
Before I moved on I decided to update the firmware as a new version was available on the copymaster website.
It uses a Chinese installer , a bunch of files and a set of very simple instructions. Cura also has an installer which is in English so I just used that. The instructions don't say what .HEX file to us for installing but there was a clear filing system for each of their 3 models and a separate file in a different place. I first installed the 300 firmware which took a few minutes to go then installed the other file. I was thinking here: a bit like a camera, this printer may have A and B firmware. it doesn't. the second file whipped the OS from the little computer and effectively bricked the printer. SHIT!
I looked for help online but couldn't find anything specific. Any similar faults seemed to have brand specific fixes, hugely long winded coding answers or just buy a new motherboard.
I shot an email off to the manufacturer asking for assistance and dived deeper into the Internet furious with myself.
I eventually found a way to talk directly to the main bard (which is a bit like a Raspberry pie) using the manufacturers software. From here I could install a basic version of Marlin. Now I had achieved this, Cura recognised the device as a printer and I was able to flash the firmware again. I was extremely relieved to see the splash screen flash up on the display after a few minute nail biting.
When I got a reply from the printer manufacturer they didn't have a fix so I was happy to share what I did with them in case someone else had the same problem.
For Cura to recognise the printer via USB I had to unistall the main board software but (hopefully) I wouldn't be needing it again.
The new firmware did tidy up some menu wheel direction changes and tidied up the menus more generally. Glad that was over!
More testing
I printed a more complected test with overhands, bridging, nominal dimension, details and stringing tests to name a few.
I started off with lots of adhesion problems which I found some old hair spray helped.
The end result came out about average judging by what people were sharing. The overhang started to fail at about 65 degrees, details weren't the best with over extrusion and the sharp edges were a bit globby. The bridging was however perfect and larger dimensions were pretty bob on.
A celebratory Flexi-Rexi was then printed to end the night.
The following day; a 1kg roll of Sunlu black PLA turned up. I wanted to eliminate the quality of the kit PLA before I messed with too many setting so I loaded the new PLA and started a series of First layer tests.
The first one, although printed centred was better towards top (end) and right whilst showing different leveling heights across build.

The second attempt followed another relieve and I changed the settings to a Wanahoo Duplicator 9 which seems to share a lot of components with the Copy master. This would eliminate input errors by me.

Learning from that I adjusted the Copymaster settings with some of the Wanahoos. Basically it made everything slower.
This seemed to work but I now had too much clearance again. It also looked under extruded.
 I then increased the first layer to .3, relieved the bed to the corners and moved the print to the front left corner with no hair spray used (yer always change loads of things at once to make it more confusing!). This had adhesion issues but at least produced a solid layer.
I raised the bed back up for the centre, moved the print back to the centre and went to the shop. I wasn't convinced my hair spray was helping a lot as it appeared to have oil in it. I found it to be unreliable so a shopping trip had me buying some stronger women's hair spray and some prit sticks. the prit stick was an immediate improvement which I used from here out.

I didn't like the first layer at .3 as it looked over extruded so dropped it to .2. THis was getting close to perfect with only glue stick marks creasing the surface and a slight thin area at the start.

Reducing retraction to 2mm seemed to help a little and lowering the bed heat to 40 degrees looked nicer.
Finally I dropped the bed 1 notch gave me a near perfect first layer.
I now felt like I could try making something useful.
This would allow me to print on the centre to a good standard but wasn't going to sort my bendy bed. Still though, progress.


Comments
Post a Comment