shhhhhhhhh pt3: Those other bits that weren't free but also weren't fans - Copymaster3D 300 24/4/20
In the ongoing quest to stop my printer keeping me up all night, which as I am printing 24hrs a day would be quite nice; I have pushed the boat out and have actually spent some money to quieten it down.
Before I get into it though I downloaded a noise level app for my phone and stuck it a hand span away from the printer which spat out the following results:
Stock
Background 19db
Standby hot end fan
off 42db
Standby hot end fan
125 42db
Standby hot end fan
180 42db
Standby 46db
Home x 47db
Home y 52db
Home z 47.5db
Centre 47db average
63db peak
All sounds were recorded with the average of a minute running for fans or the duration on a movement being taken. Peaks like hitting stops or the tone of me selecting a motion can then can be somewhat discounted. This isn't very scientific if you hadn't guessed.
As you can see, the fans make up the bulk of the noise with the Y axis being the loudest stepper motor. Z actually came up as 47 but was flicking between that and 48 enough to make me want to make it a fraction.
Vibration dampers
I bought a set of 4 vibration dampers which also came with screws for £5.60. If you are searching for some you can search for something like:
4x Aibecy Shock Absorber Stepper Vibration Damper Nema17 For DIY 3D Printer Z8T2
which should get you in the ball park.
These normally make a pretty big difference for a relatively low cost.
The Fit
Once the parcel had arrived from its travels round the globe and I had a gap in printing; I got busy fitting these dampers to the printer.
Y axis
 I first went for the Y axis as it was the loudest and potentially the easiest to fit. Also the order will really mess with some people which fills me with joy. The stepper motor is only held on by two screws in its bracket which were whizzed off and the bracket loosened from the 20x20 extrusion.
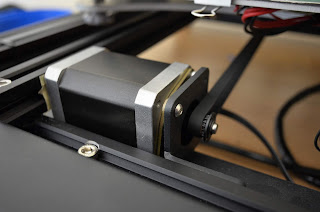
The area was cleaned and masking tape applied to all of the contact areas to add dampening which I did for all axis. Then the dampener itself was attached to the stepper motor and then to the bracket as shown in the image on the right. I could no longer run the belt tensioner I had added a while ago as this now impacted the frame but I was able to shift the idle pulley to the right and take up the slack to keep the belt tight and straight. If I get any issues with rubbing I may be able to shift the build plate attachment to one side. The easy one is done for now.
X Axis
There is a little cover on the X axis with the X stop built into it which is held in with two screws. With this off the stepper motor can be removed easily.
Due to the way it is mounted however you cannot just plug and play with the damper mount as it would take the gear out of alignment with the 20x20 extrusion in which the x axis belt runs. These do come up on Amazon but sadly out of stock whilst I was performing this mod,
With the X axis not working I decided to give Z a go. This one doesn't really need doing as it rarely moves more than 0.25mm at a time anyway. I did have the parts however so it seemed rude not to at least try.
The stepper motor is held in by two screws this time via a bracket on the gantry. Clearly I was going to be reducing this to one fastener which is less than ideal but I have it apart now so might as well carry on.
The stepper motor is held in by two screws this time via a bracket on the gantry. Clearly I was going to be reducing this to one fastener which is less than ideal but I have it apart now so might as well carry on.
I fit this whilst the printer was still upright which made it more tricky than it needed to be but was still doable.
The spring mount grub crews were loosened and then the drive screw could be pulled clear of the stepper motors drive shaft so it could be removed. Then the damper could be fit and everything plopped back in. Now just do the same on the other side.
Easy!
result
With this all done I retested the noise levels:
Background 19db
Standby 46db
Home x 47db
Home y 48db -4db
Home z 46db -1.5db
Centre 47db average
63db peak
The Y axis was a substantial drop falling well below the noise of the fans. The Z was also noticeably quieter during centreing and bed levelling. Not a bad result for a relatively low expense.
I will be interested to see if I get any accuracy issues or added ghosting but these mounts are pretty tight so I don't think lash will be a big issue here.
Prevent the noise transmitting
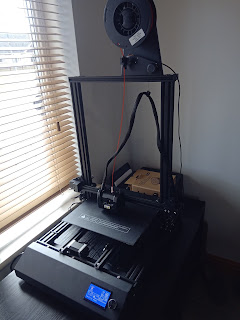
The other big change was using an unused section of kitchen surface to dampen vibrations from getting from the frame to the work bench top. A cement slab works very well, but I didn't have one so this piece of counter top wold have to do. It was surprisingly affective and also helps the printer face the right way round finally.


Comments
Post a Comment