Still learning and fine tuning - Copymaster3D 300

Intro
I was a few prints into ownership now. Some fine tuning had taken place so I felt like I could print more complicated designs.
I tested things with a switch blank for my VW Corrado G60 which printed nicely save for a bit of layer shifting.
Most of all I learned that plugging the printer into my computer makes the SD card print stop, Won't do that again!
A long 24hr print of a basket had shown that stringing was one thing the printer was pretty good at avoiding. In fact it came out really nicely. This would theme where I would print something nice followed shortly by the printer spraying plastic everywhere in the next attempt with no changes. Oh the joys of 3D printing...
Next I printed a tool holder designed for a Creality Ender 3 which fits the back of this printer nicely and gives me a place to stash all of those tools where I can get to them without going out to the shed every time.
It actually printed out really smoothly with only a little sagging for the log scraper slot and a bit of ghosting on the alen key holes.
 I followed this up with a telescope mount for my Nikon D3X. Shown here with supports removed it came out quite smoothly but a noticeable line exists where the print ended. I had recently reduced retraction as it seemed to extending as much but now I as getting a bit of a tag at the end of each layer. More importantly I was getting ghosting which was most likely being caused by a lot of movement caused by the print rocking about of my unsubstantial desk.
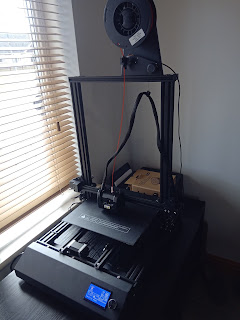
I moved the printer upstairs to a sturdy solid wood set of drawers (that were still not deep enough for the printer!) which was starting to look like a little boys dream bedroom.
This would mean I couldn't directly tether to my desktop computer anymore but I have a laptop and SD card printing is more practical for long prints anyway.
Another bed leveling session followed with me printing a battery holder rather than the first layer test I had intended.
 As the first layer had printed out nicely I let it carry on. I was also curious as it was the widest print I had done yet so was interested to see how it performed.
The left edge hung slightly outside of where I had applied glue stick so it wasn't adhering properly. A little spray of hair spray seemed to make things worse. It seemed the PLA didn't like the hair spray but looking back I'm guessing the Butane propellant probably acted as a solvent and attacked the plastic and glue.
Another thing I wont be doing again!
I let the print carry on anyway as it looked otherwise okay and it came out quite nicely.
 The left battery holder is a bit more shallow than the others but it looks fine to me.
I printed with a temperature of 200 degrees at the nozzle and 50 at the bed. Layers where .2mm with a first layer back up tp .3. I infilled at 15% in a grid pattern with a wall thickness of 2. This isnt the most sturdy way to build but it came out pretty robust so I will be interested to see how well it survives in my garage.
By now I was pretty tired of leveling and releveling the sodding bed. Especially when it wasn't flat in the first place.
I hit the shops online, bought a BLtouch kit from Copymaster and a glass cutter from eBay. Time to get that bed level!


Comments
Post a Comment